-
Ensure that 3CX v15 was installed to your Windows or Linux server and that you are able to access the login screen using the FQDN/IP address and port number you specified during setup.
-
After logging in as an administrator, configure your VOIPXCHANGE.net trunk by clicking on the "SIP Trunks" button found on the left toolbar.
-
Click on the blue "+ Add SIP Trunk" button at the top of the new panel and select "Generic" under Country, "Generic SIP Trunk" under Provider, and then put your Trunk # under "Main Trunk No."

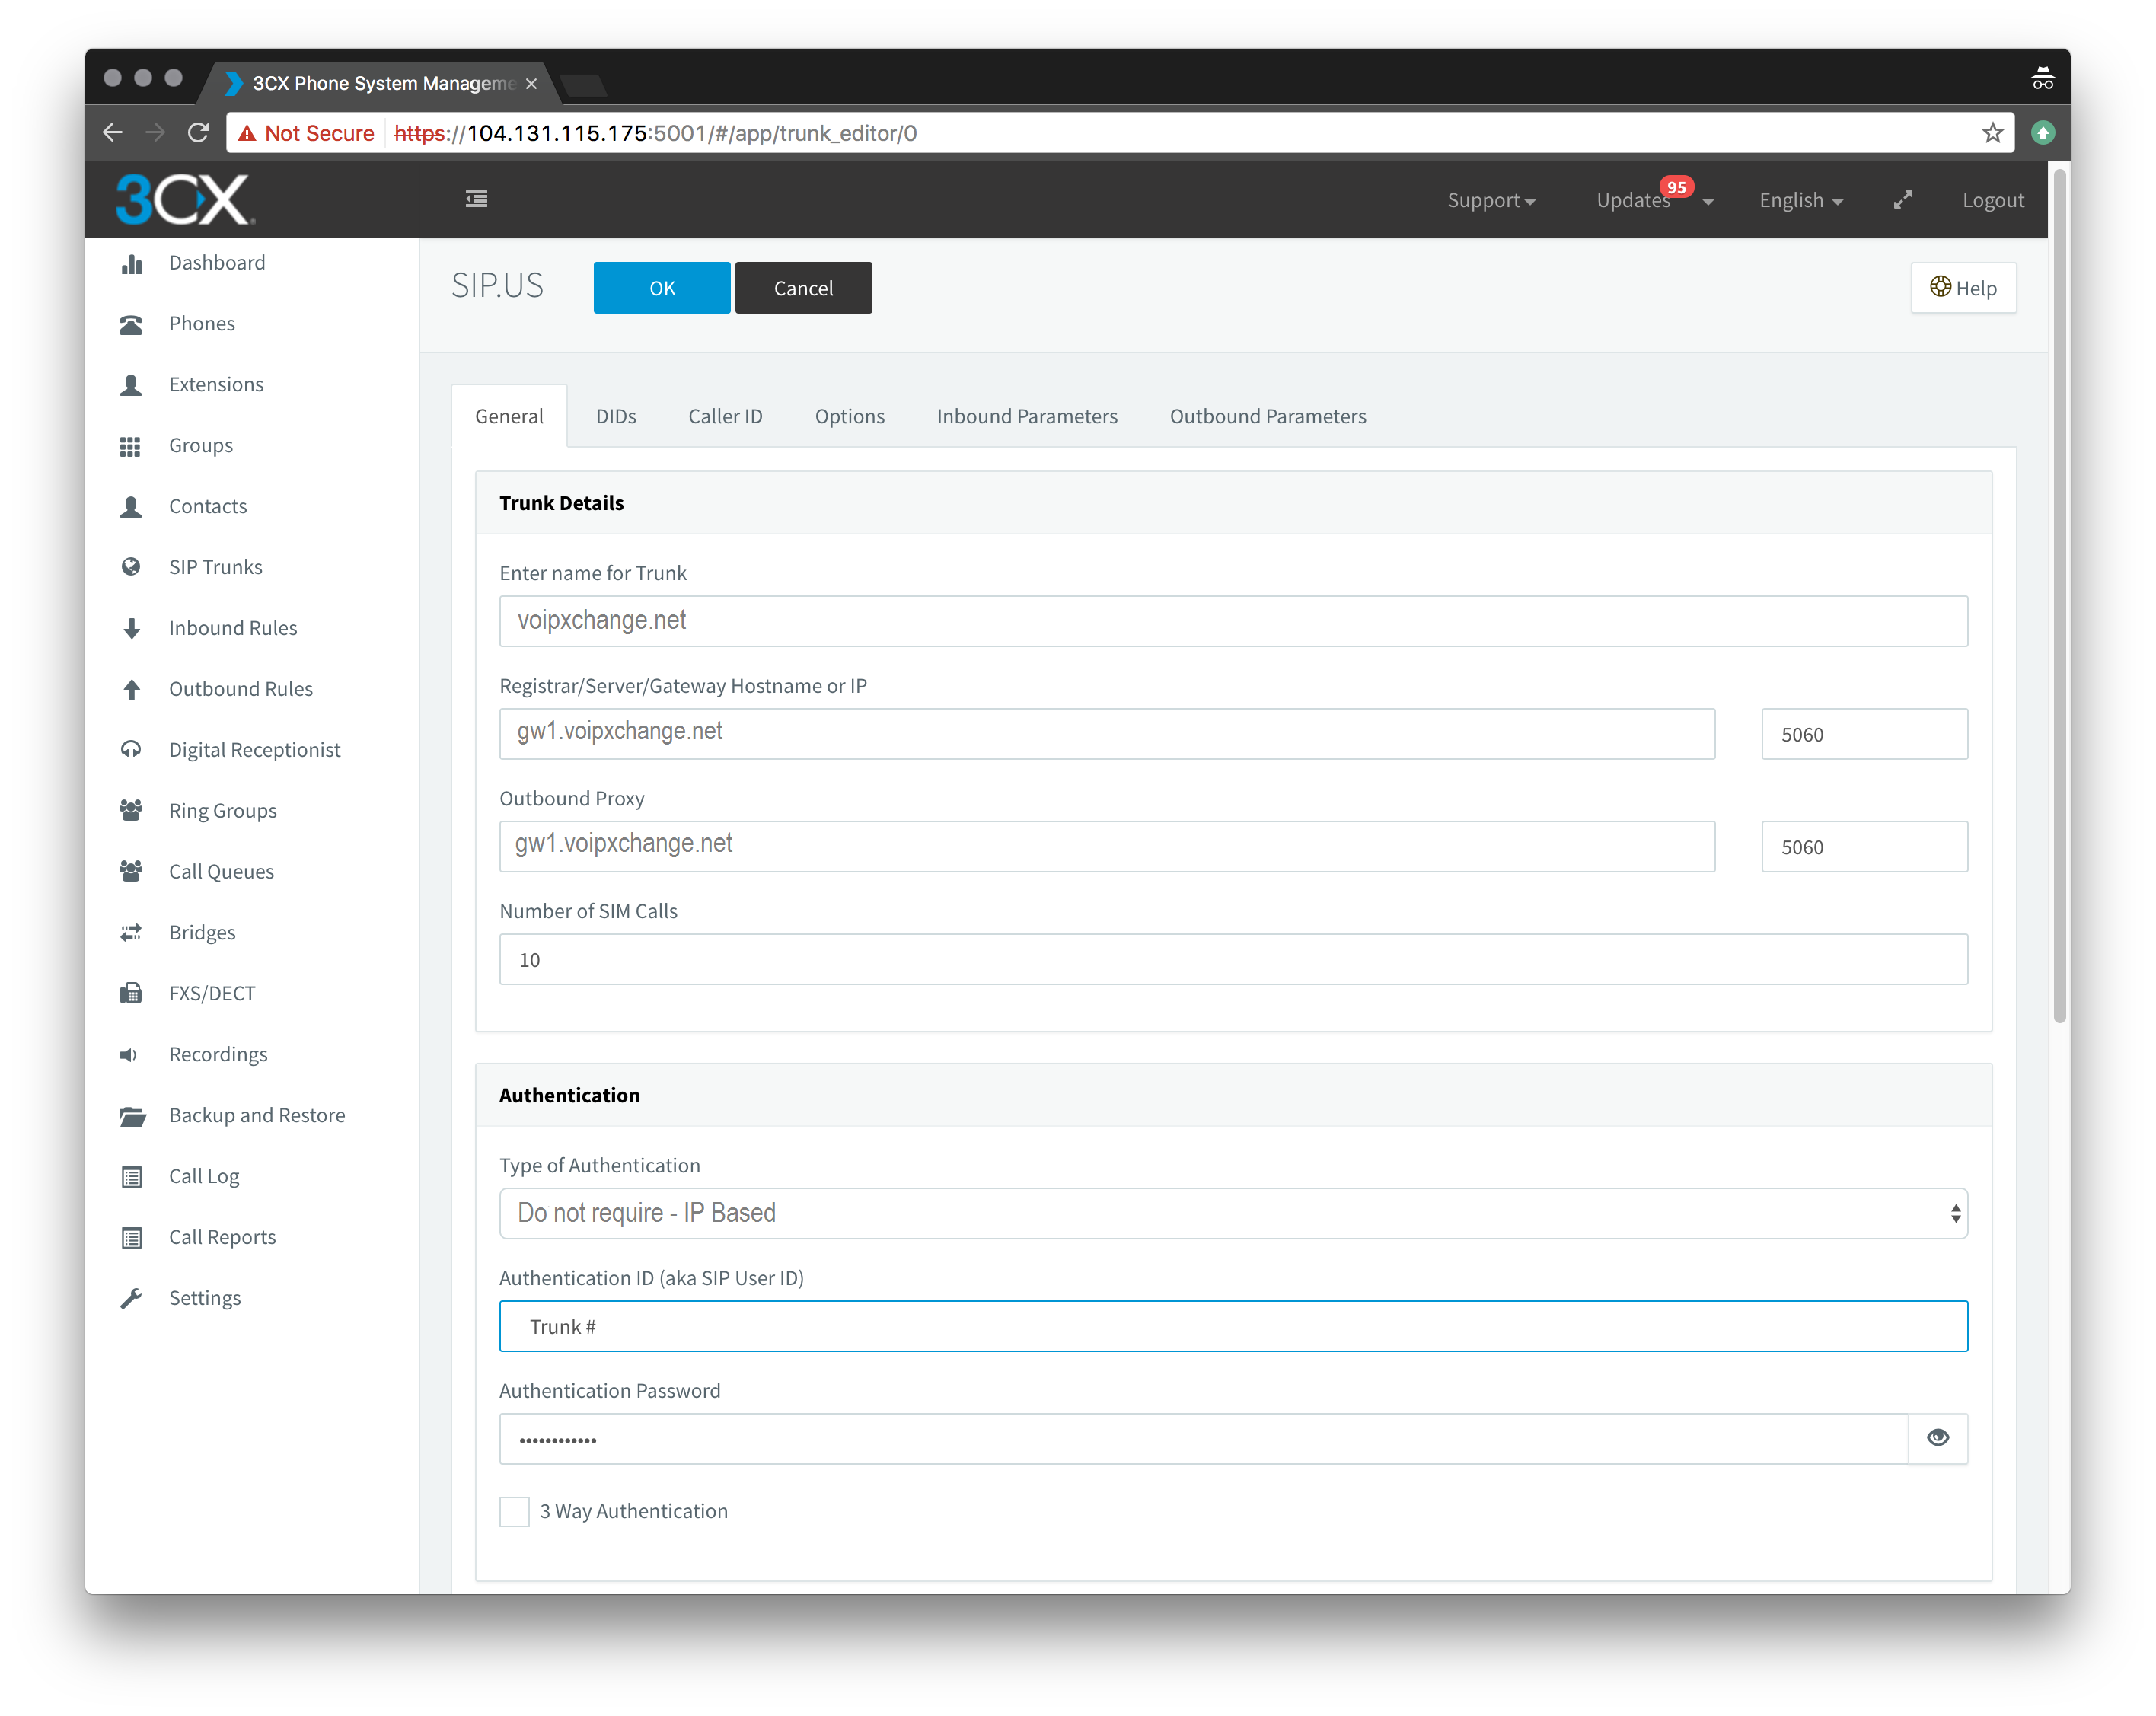
- At this stage, many of the configuration settings have automatically been filled in for you, but it is still necessary to configure your account based on your needs. Most specifically:
- Registrar/Server/Gateway Hostname or IP: gw1.voipxchange.net and port 5060.
- Outbound Proxy: gw1.voipxchange.netand port 5060.
- Number of SIM Calls: Default is 10, but needs to be adjusted for the number of channels you have purchased or plan to use with this system.
- Type of Authentication: "Do not require - IP Based."
- Authentication ID (aka SIP User ID): Enter your Trunk # if provided or use a 6 digit number unique in the system.
- Authentication Password Enter your Trunk's password if given here.
- Main Trunk No: Trunk #.4 digit number unique in the system
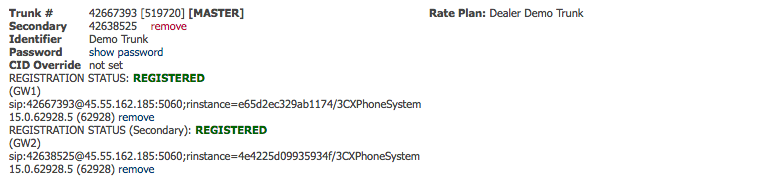
- After you click "OK" at the top and the trunk is registered, you will need to register another trunk to gw2.voipxchange.net. To accomplish this, you will need to contact SIPTRUNK support at 408-912-7000 Option 4 and request a "Secondary Trunk" be added to your existing trunk. Once done, your trunk will appear as follows.
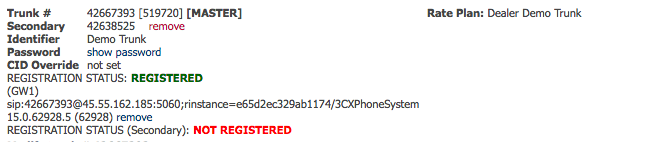
- The secondary trunk will have a different trunk number, but the same password. Follow the steps from Step 4 to register this secondary trunk replacing the 'Authentication ID' with the new trunk number, and the 'Registrar/Server/Gateway Hostname' with gw2.voipxchange.net
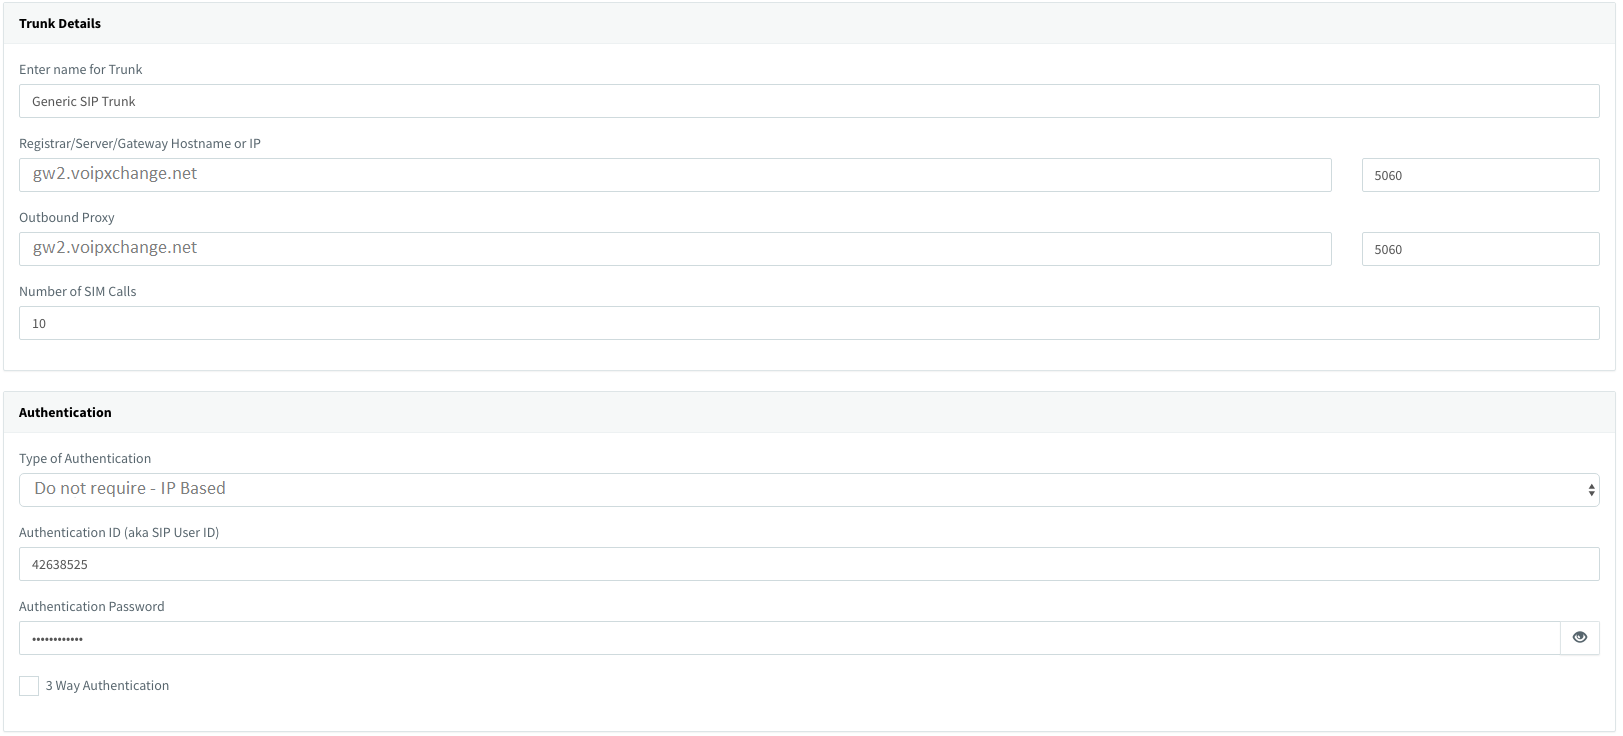
- After you have your secondary trunk successfully registered, your SIPTRUNK trunk should look like this
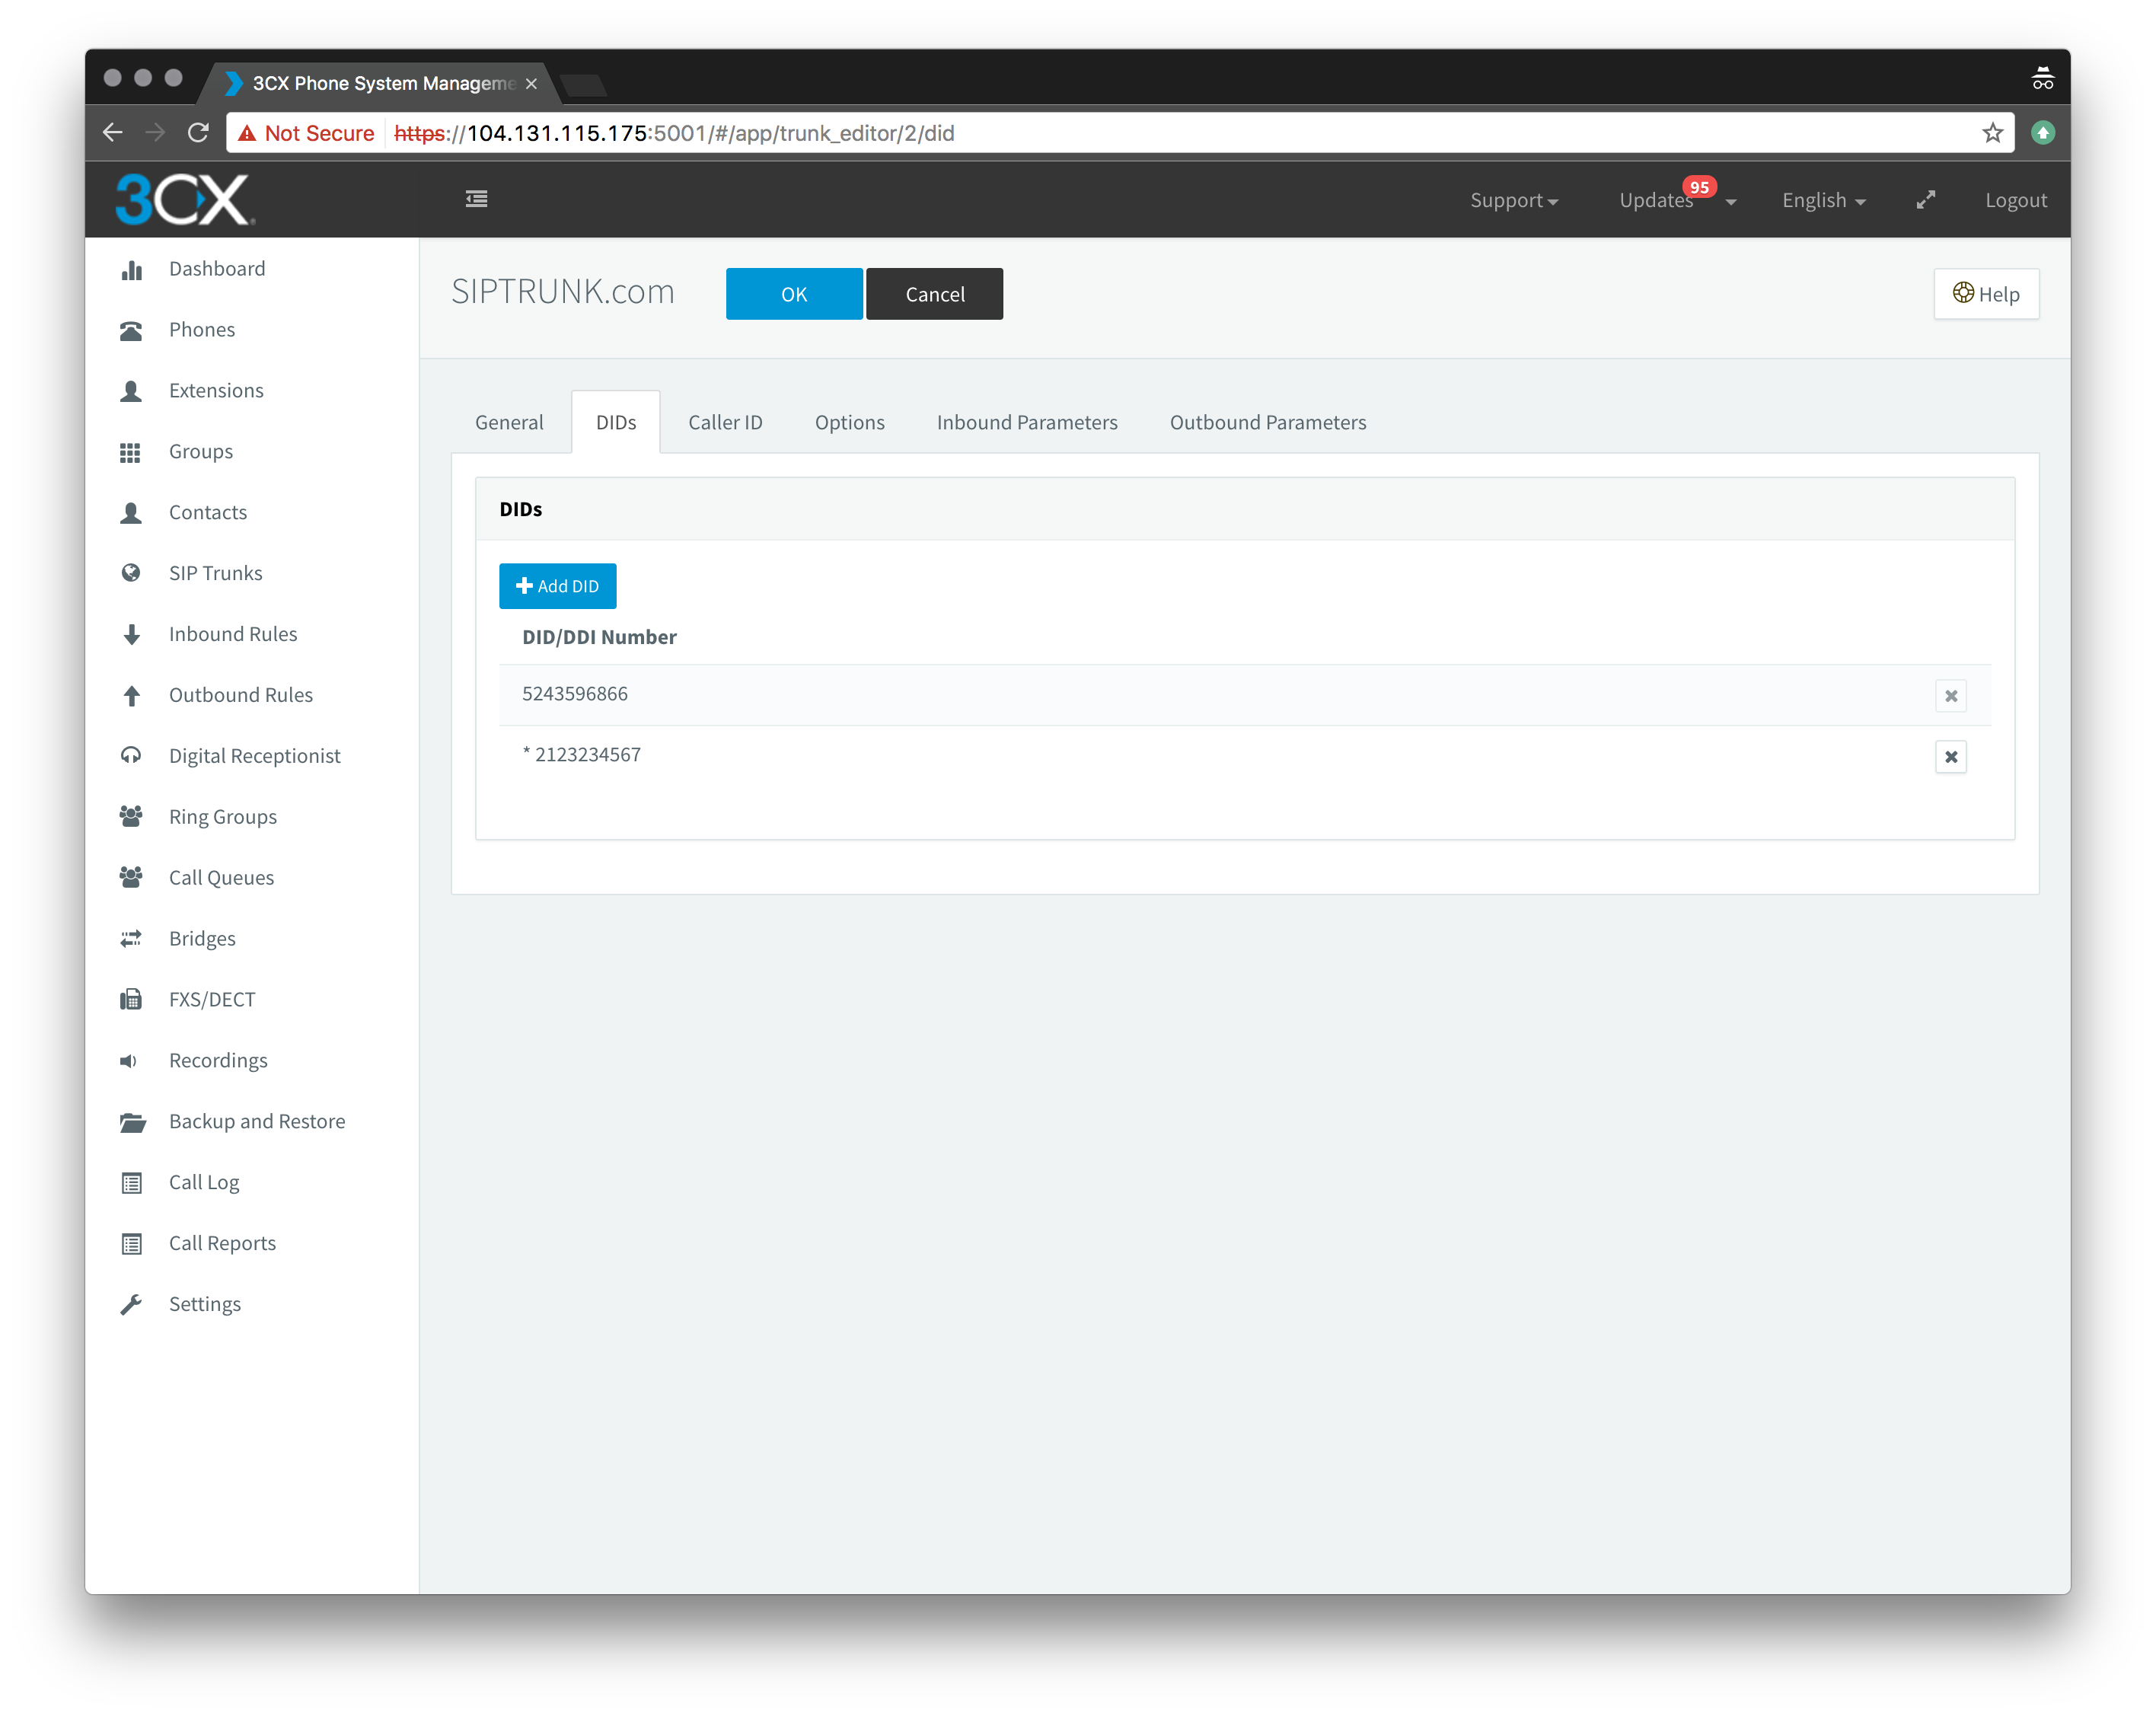
- You can now add DIDs into your configuration and route them to extensions, queues, ring groups, etc. Do this by clicking on the "DIDs" tab on the trunk page. Then click "+ Add DID."
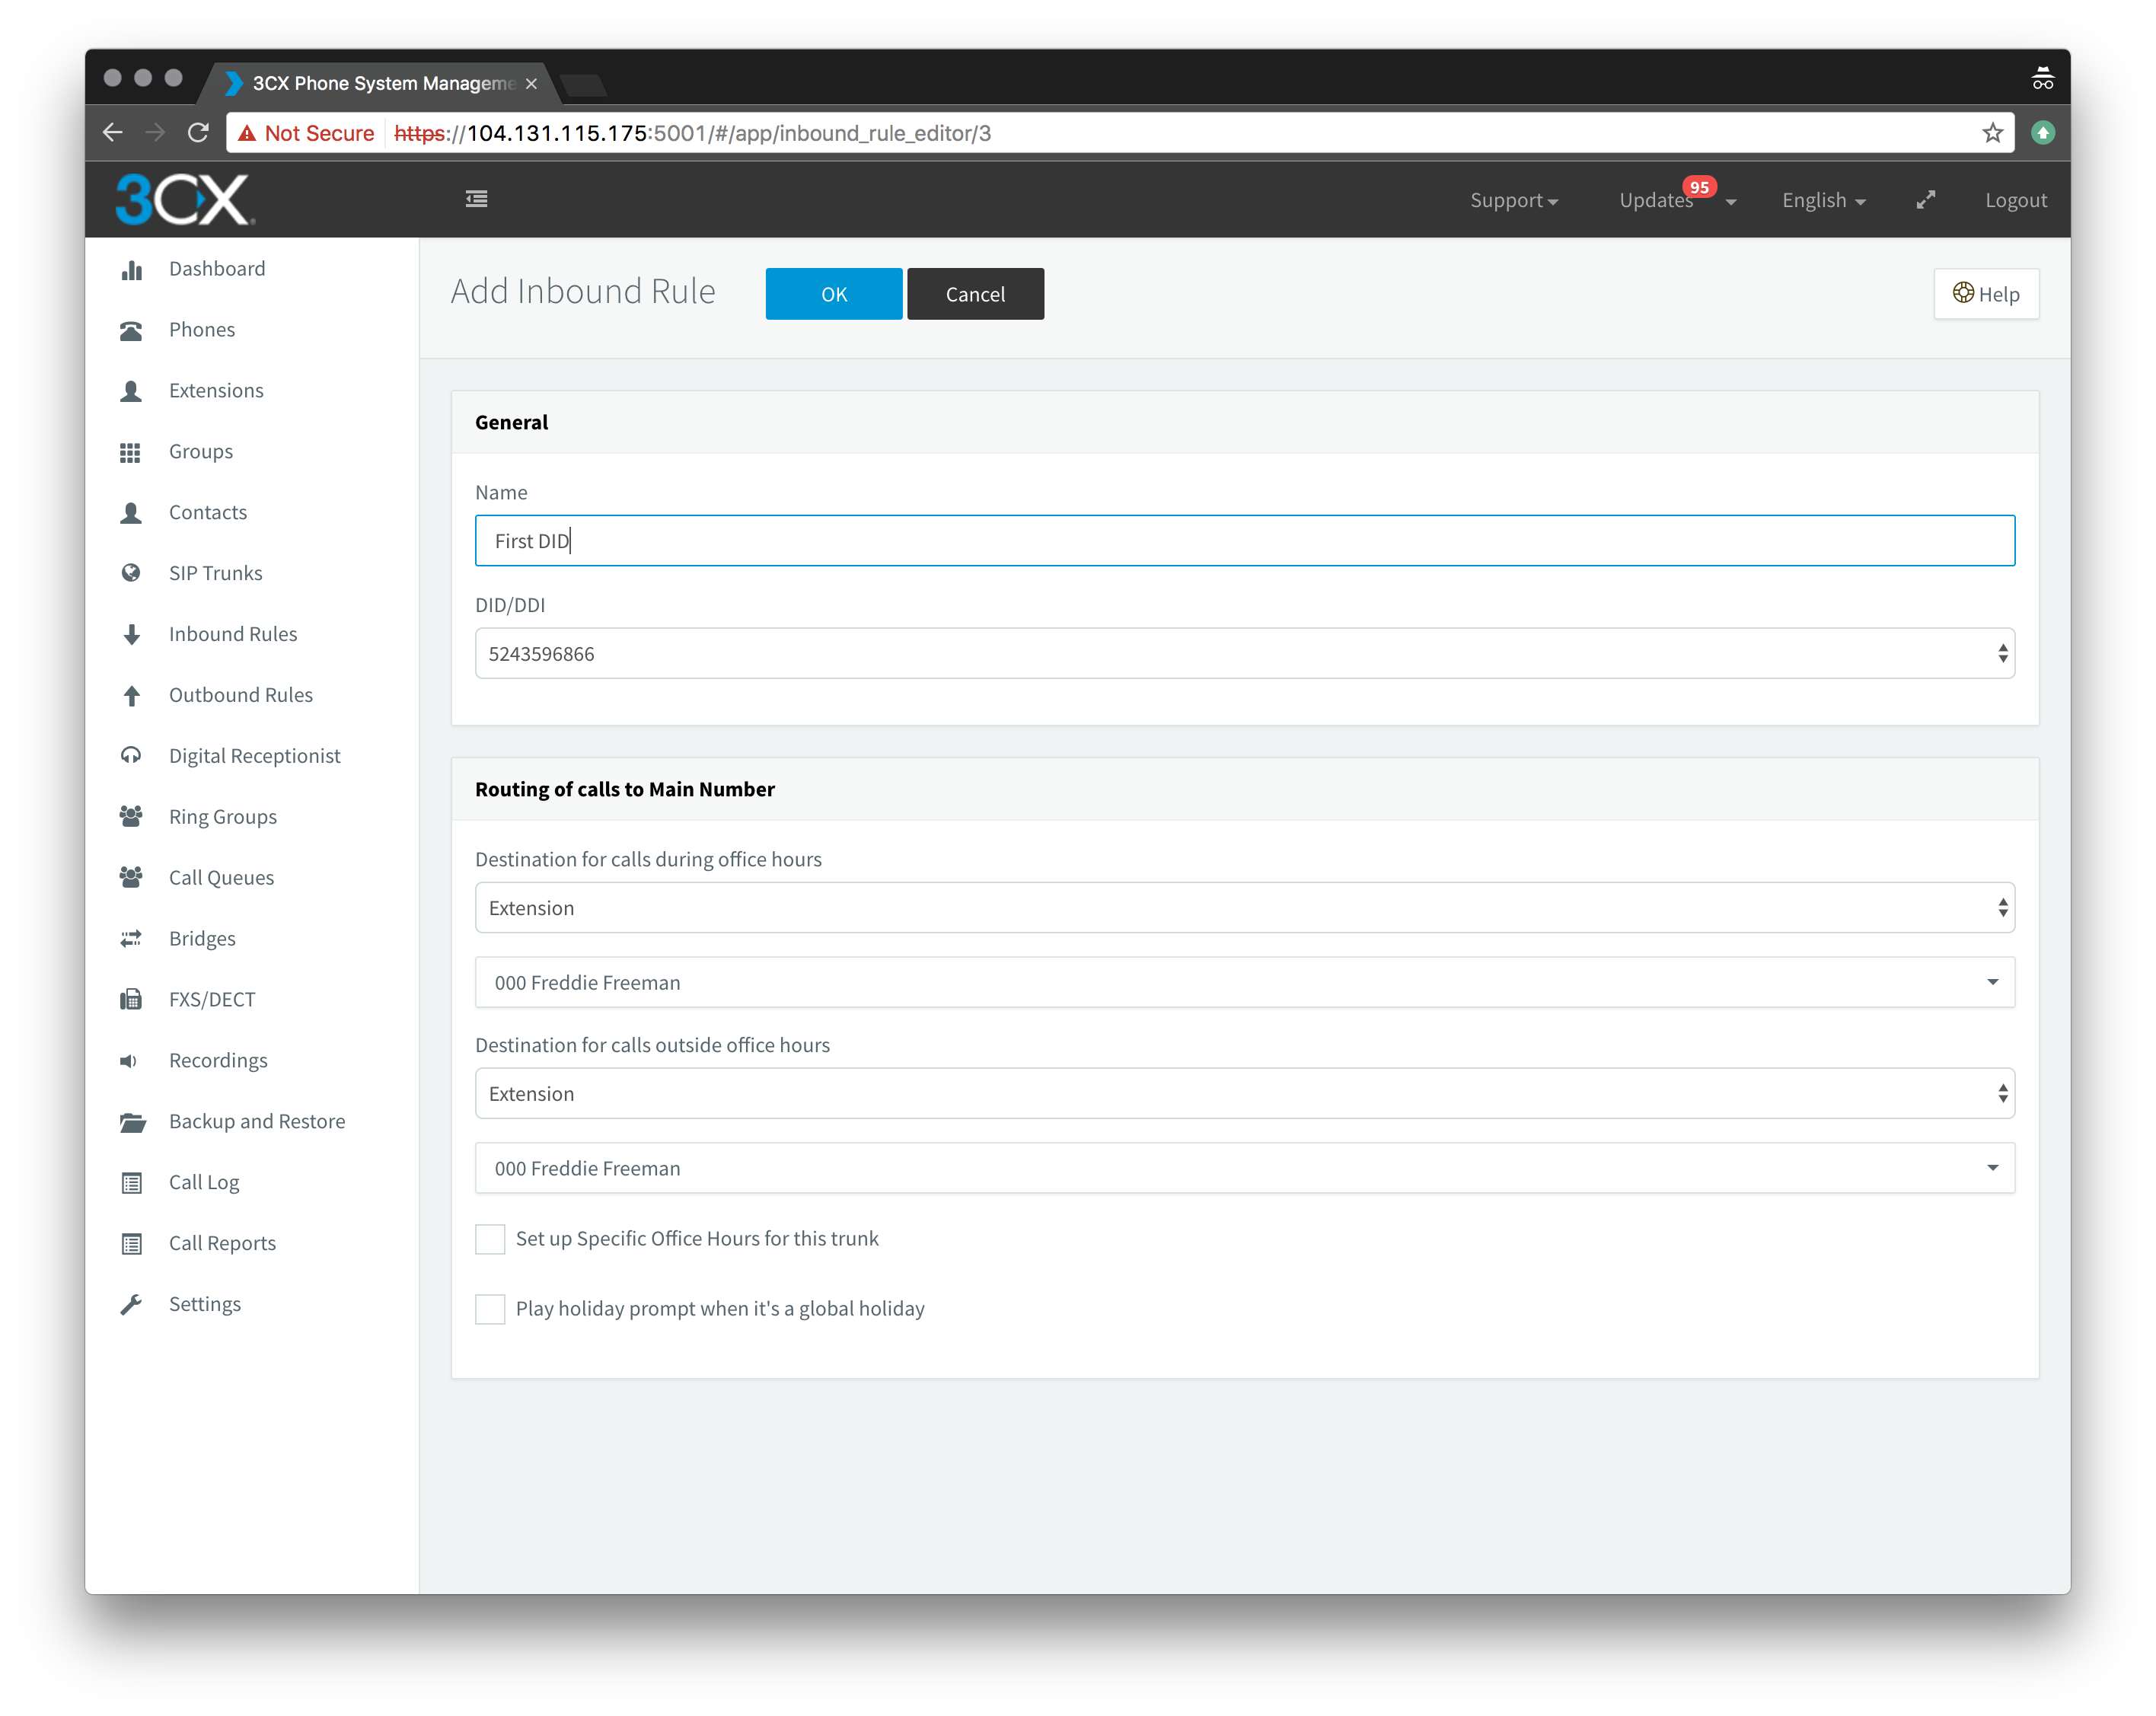
- After adding your DID(s), you can then setup inbound routes. Click on "Inbound Rules" on the left toolbar, then click "+ Add DID Rule." Here, you can name the rule, select the DID you would like to rule to respond to, and then decide what extension, outside number, etc. you want it to route to. In this example, my DID routes to extension 002, during and outside of office hours.
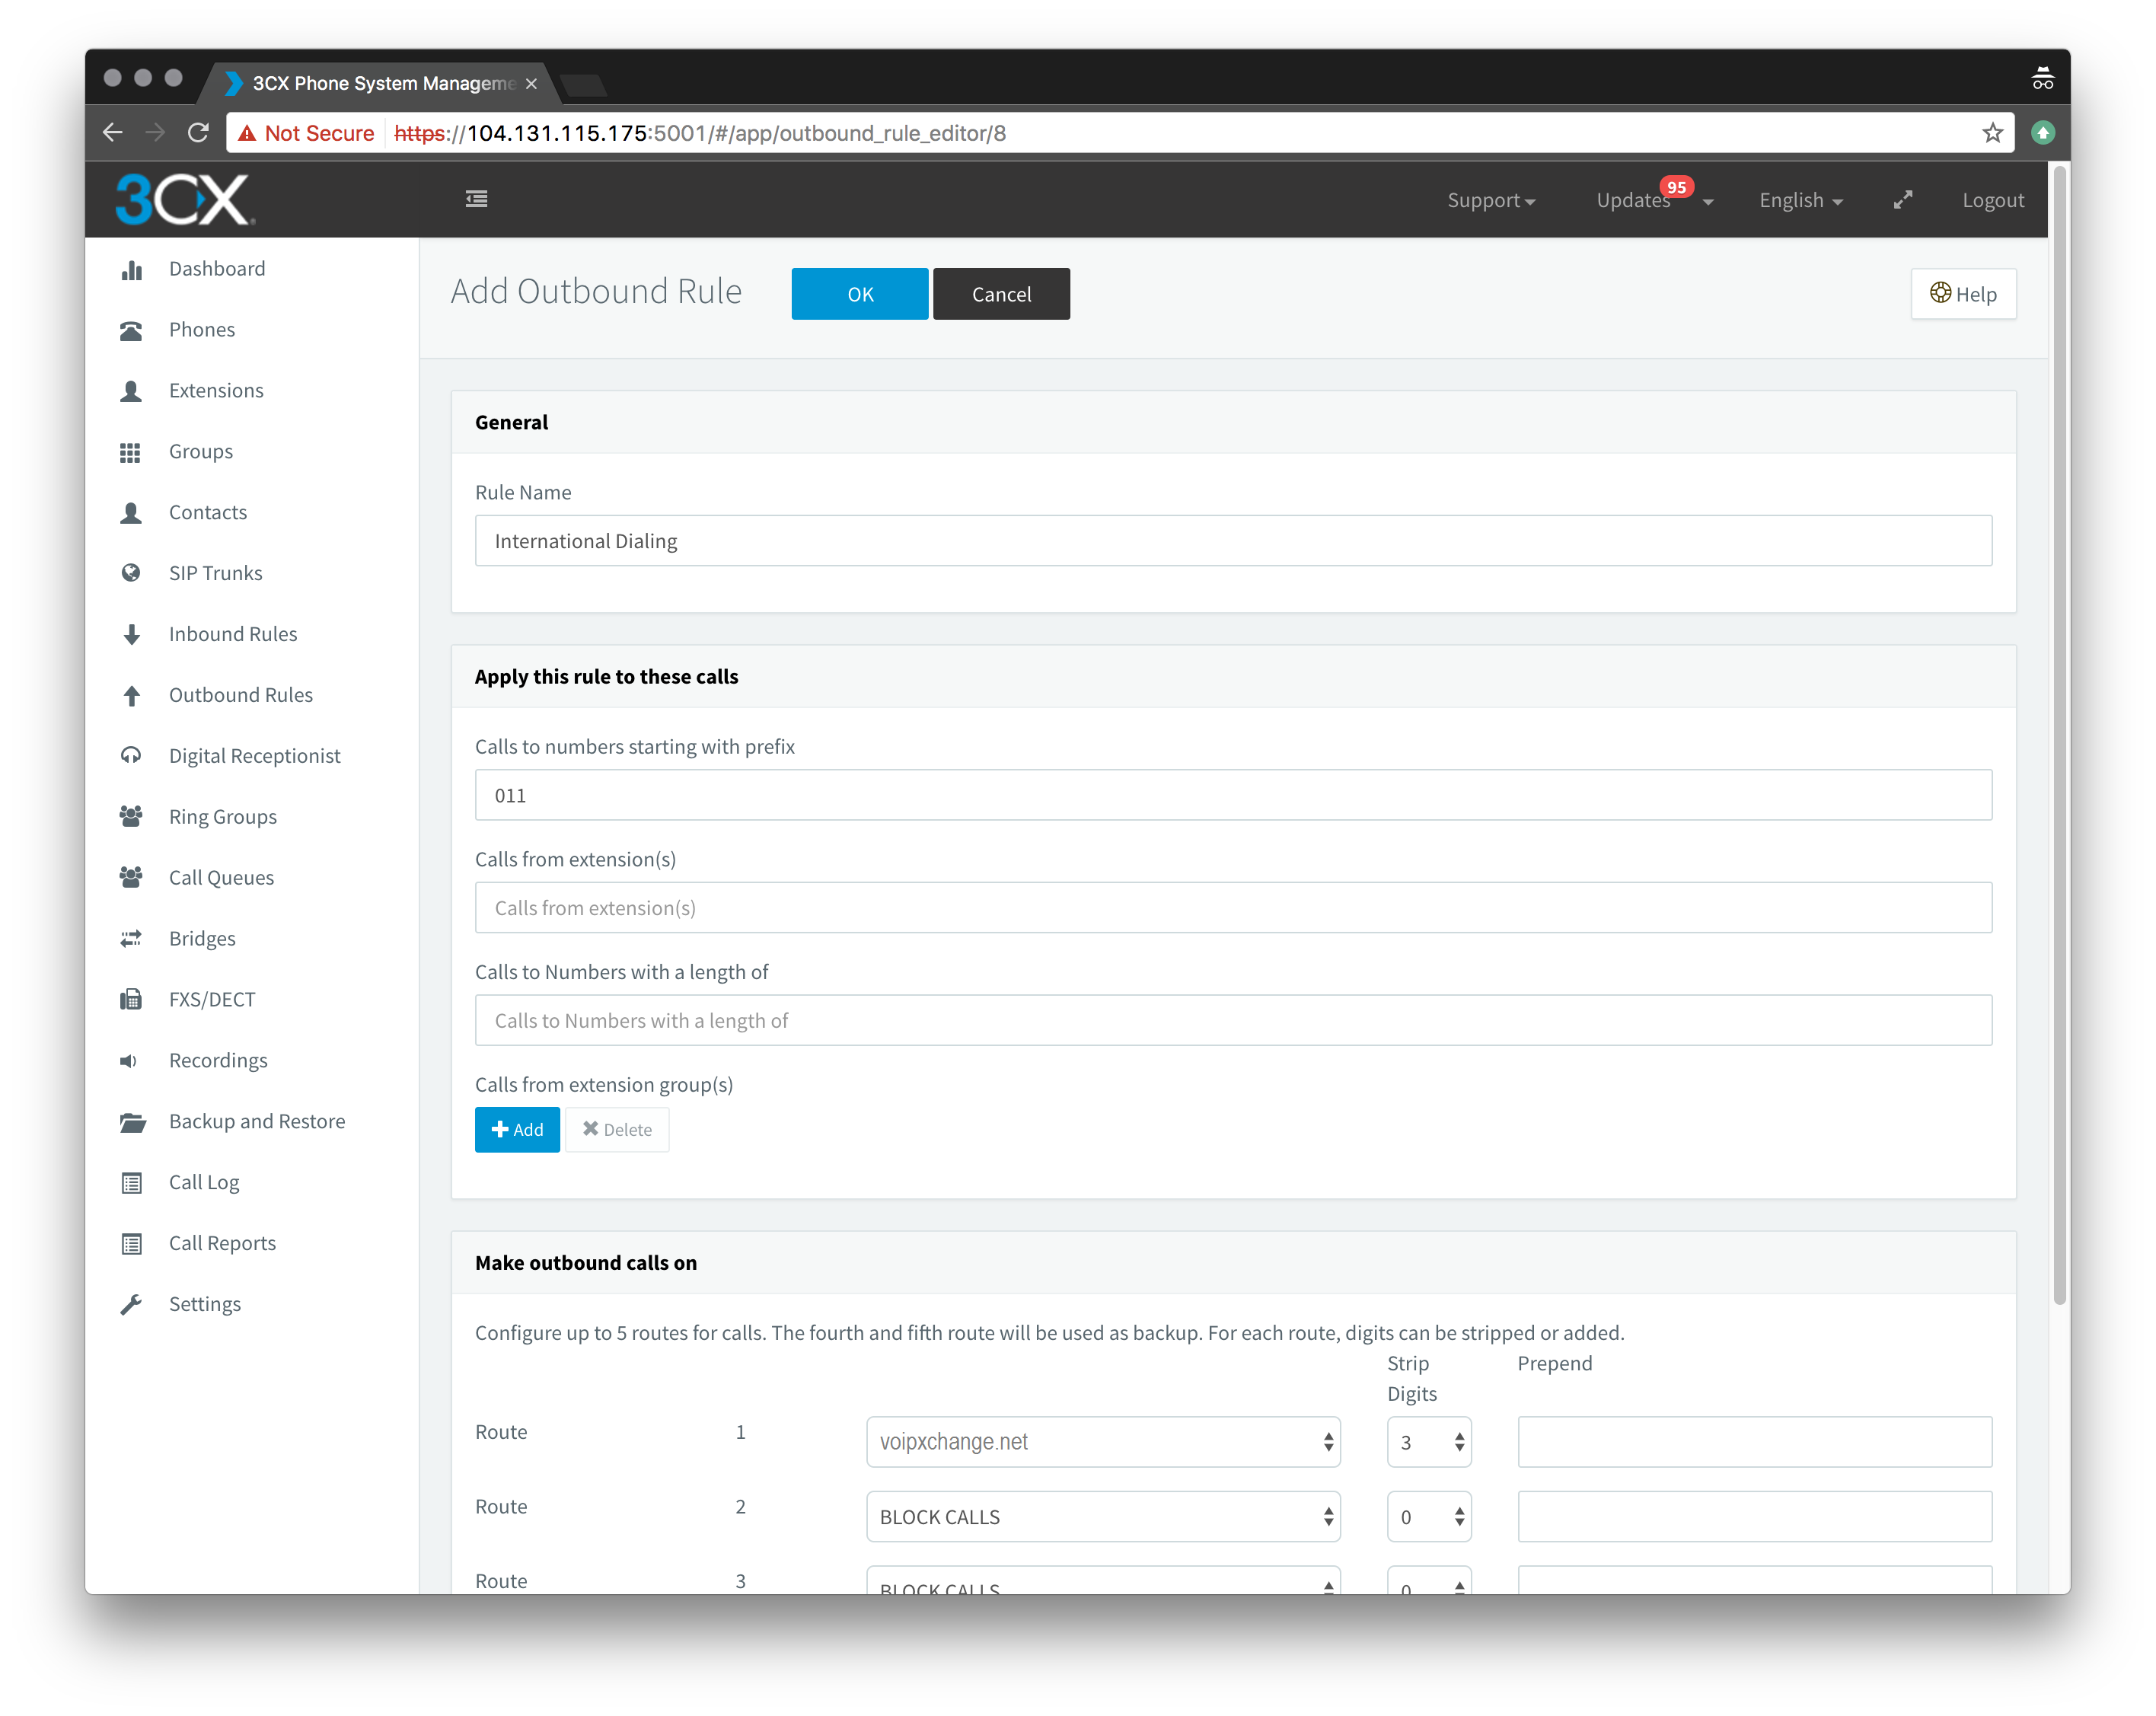
- In order to enable outbound calling, you will also need to configure a handful of Outbound Rules. Click on "Outbound Rules" on the left toolbar and for each of the following screenshots, create a new rule by clicking "+ Add." Be advised, it is very important that the voipxchange.net trunk you configured earlier is selected as the 1st route. Once you have duplicated the information seen in the screenshot, click "OK" at the top to save.
For general dialing of 11-digit North American numbers, this route will take the number and route it directly to voipxchange.net. For general dialing of 10-digit North American telephone numbers, this route will route dialed numbers with a length of 10 digits and add a "1" to the front of the number. Then it will route to voipxchange.net. Pay special attention to the "Prepend" column.
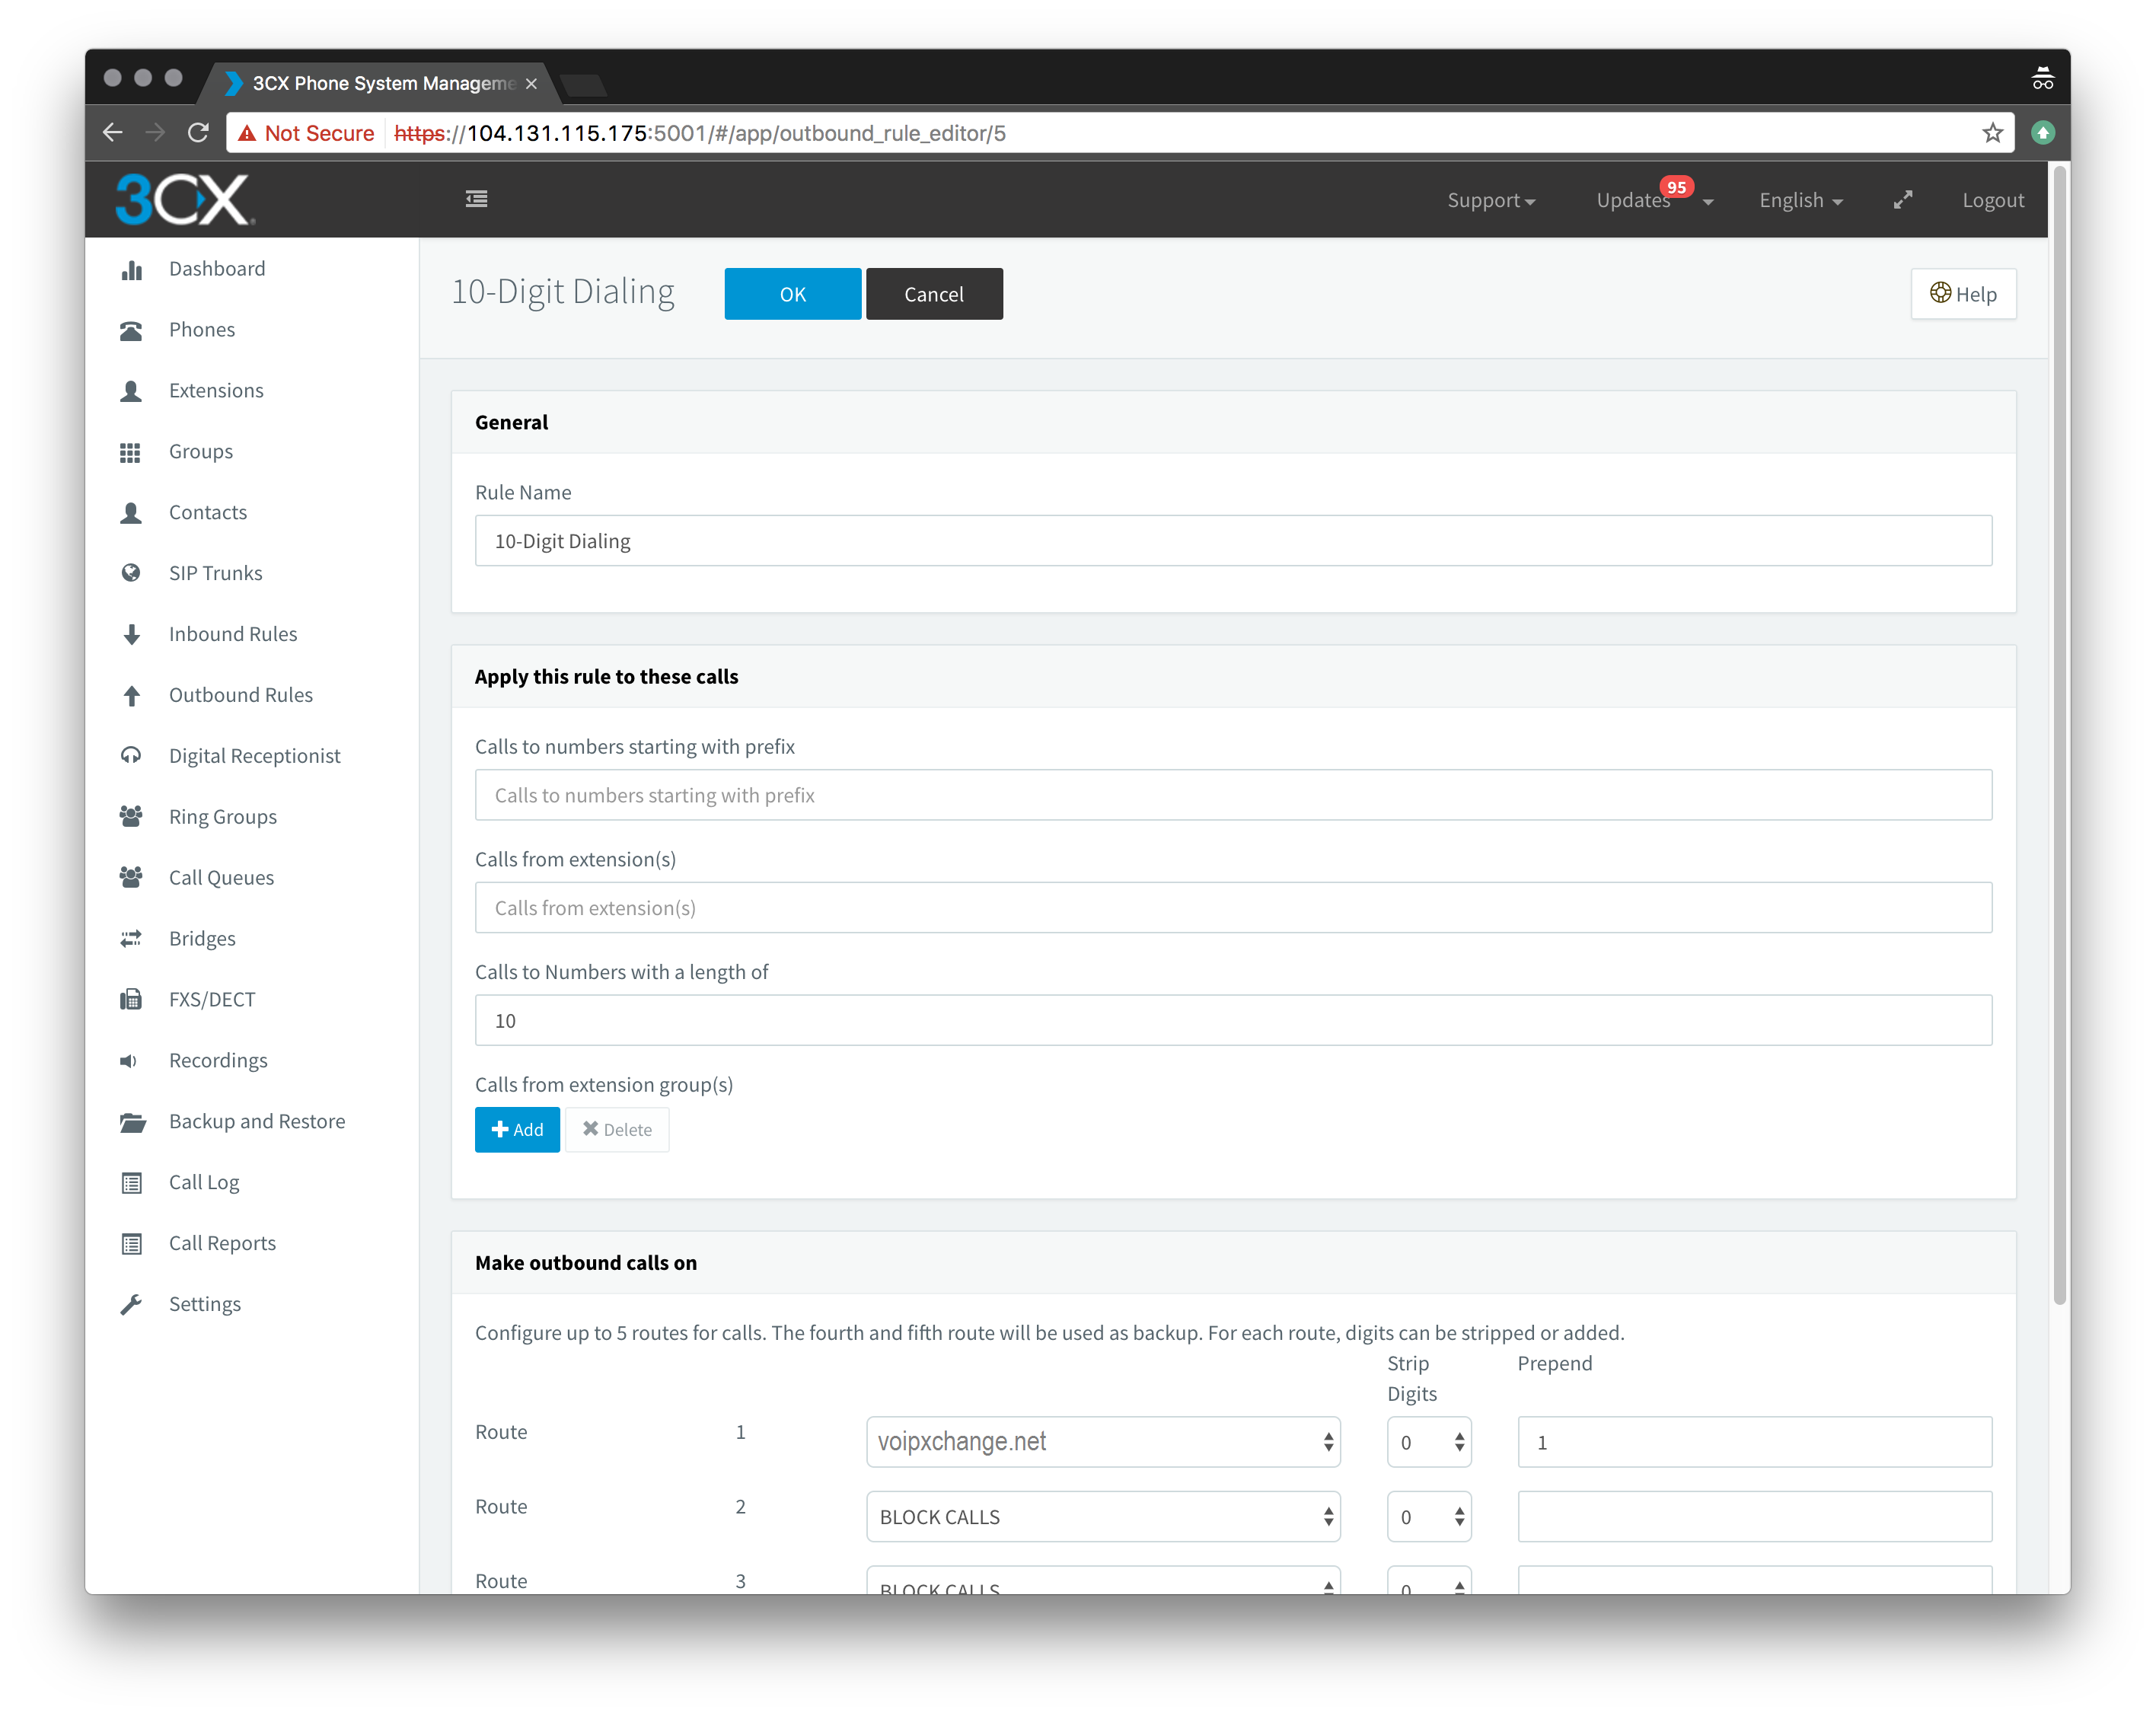
For Emergency Calling, this route will take all calls that begin with a "9" and are 3-digits in length. These calls will then be routed to voipxchange.net.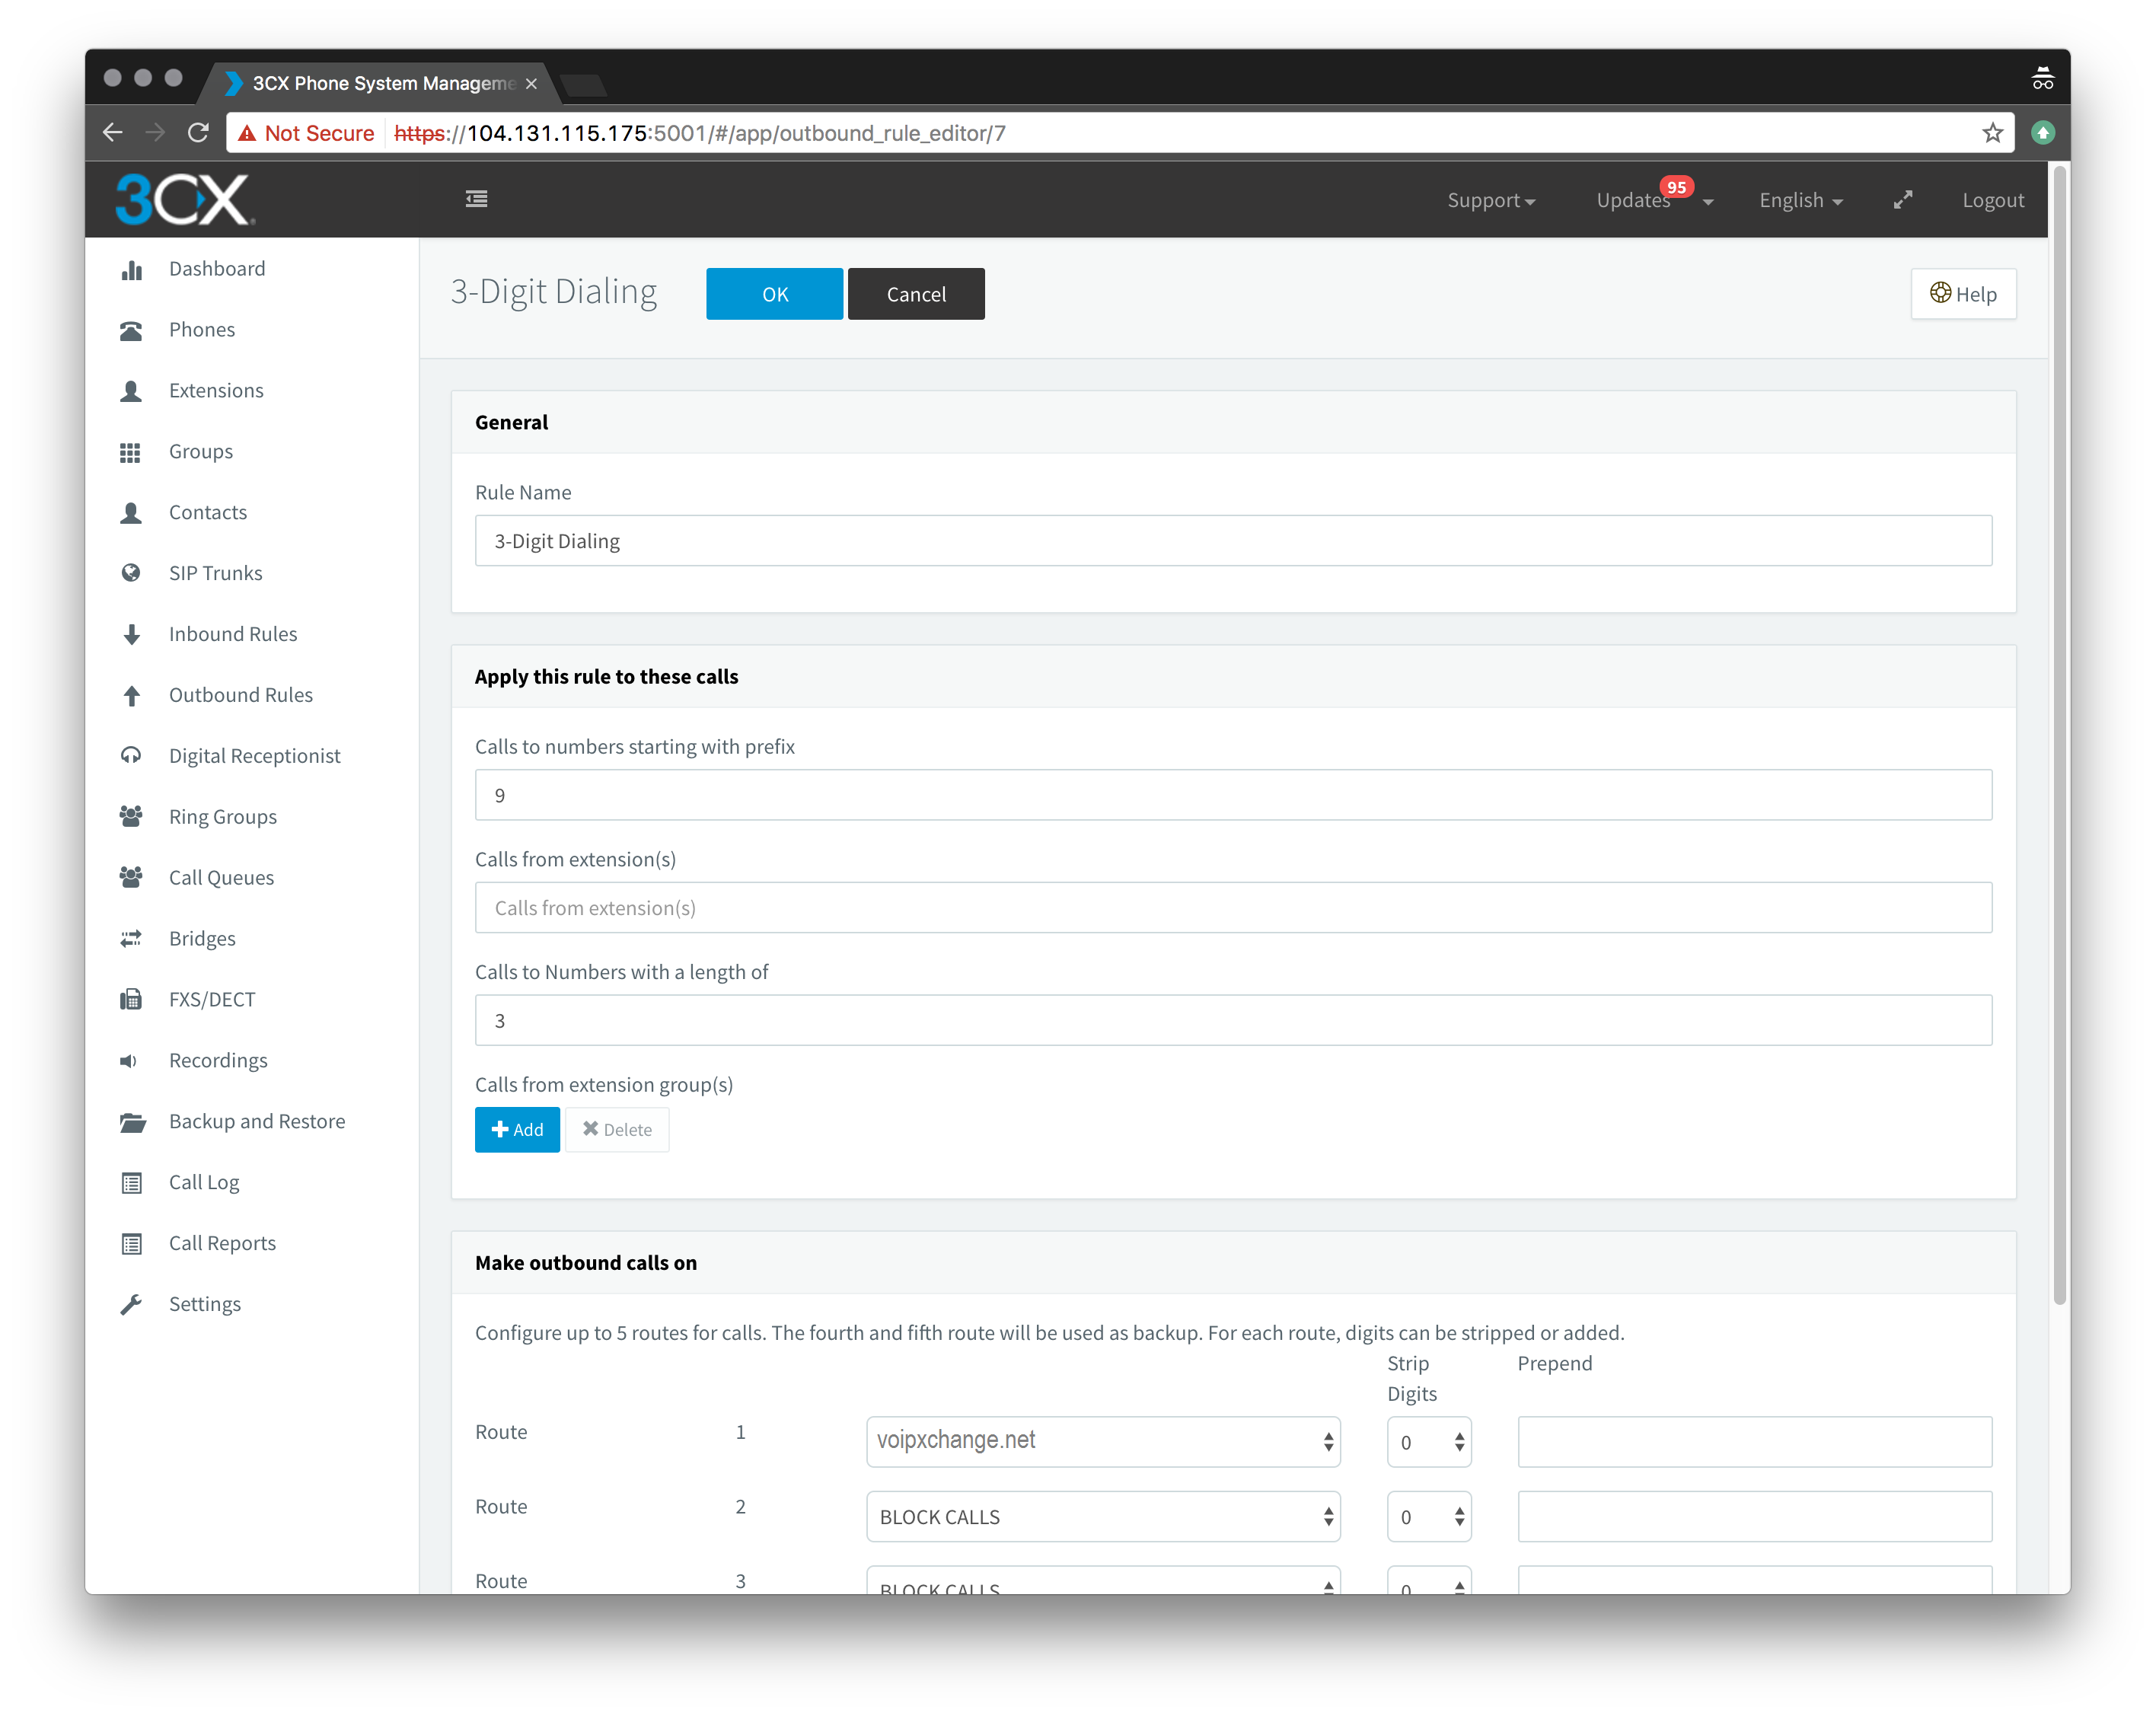
For International Calling, this route will take all calls that begin with "011" or the Interntional Exit code, and then send that call to voipxchange.net after stripping the first the digits (011) from the number. Specifically, notice the "3" under the "Strip Digits" column.